• Enter your email address to subscribe to this blog and receive notifications of new posts by email.

    Join 3,860 other subscribers
  • Flickr Photos

  • itunes

  • Most popular clicks on my blog!

    • None

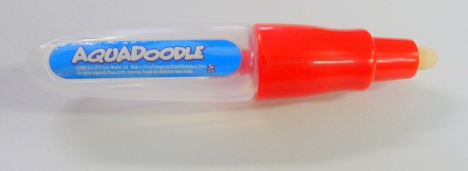
Aqua Do-Doo

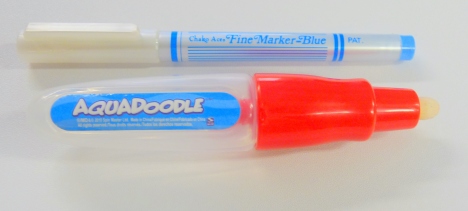
You know those blue pens that are handy for marking your fabric?

Kind of like this one.

And they leave a blue mark? Because they are supposed to. Which is great because I marked it for a reason.

But I don’t always want to ‘wash’ what I have marked to remove it. And I don’t have a sink nearby in my basement.

Aqua Do-Doo to the Rescoooo! (max calls it do-doo and I see no reason to correct him).

Aqua Doodle (for those without young one’s and therefore no idea what I am talking about) is a kid activity thingie where you fill this ‘pen’ with water and the write on their special (read: pricey) surface and it changes color when wet and goes back to blank when it dries. Hours of entertainment. Or heartache when they try non do-doo pens…

but I digress.

This little toy is GREAT for removing the blue pen marks without washing the item you marked! I am so pleased with myself about this one – I really am. Never mind hours of entertainment for them, I now have minutes of sheer pleasure for me:)

(ps – I have seen these pens sold separately from the kid activity thingie at stores like target and wal-mart)


A Finish!

It has been a long (like embarrassingly long) time since I have had a real ‘finish’!! Oh sure, there have been lots of starts – but no finishes! I had forgotten how good it feels!

Do you remember the Seams of Opal quilt? That I posted about and did tutorials one, two, three and four about? I also had an update about it here.

Well – this is the grand finale of updates!

When my nephew ‘baby Jack’ was born – I knew this quilt had to be his.  It is the perfect ‘throw on the floor and add baby’ quilt – lots to look at and tons of texture.

Originally 100 6 inch squares large – it had been made smaller because somewhere between Ohio and our final landing place I lost 6 blocks! And really – I didn’t feel like going back to the beginning (see massive tutorials above!) and he is just a small baby (and he isn’t a twin!) so how many square feet does he need? AND my mommy is going to take some of the (now) extra blocks and make him a big floor pillow to go along with it!

So without further adieu (and I really need to paint that floor – add it to the studi-O-rganization)

Here it is! I LOVE HOW IT TURNED OUT! If there is a repeated fabric in here – it was an accident! So much to see and ‘spy’ and if each block is 6 inches plus about  2 inches of sashing then this quilt is about 62*62 inches (or about 5 feet square). Plenty big for lots of activities!

And the back ain’t no slouch either! This quilt is a quilt as you go ‘a la Allison’ (again, see tutorials above) and each block has a different backing fabric and therefore it is a reversible ‘I Spy quilt’! Can you say ‘greatest Aunt ever is forgiven for  not having this ready for his birth???’ Hey, I can try, right?

A closer view of the front.

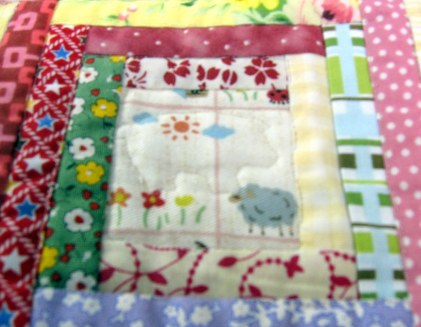
A much closer (and slightly out of focus) view of 1 block. Each block has a different free motion quilted motif in the center square and then the rest is ditch quilted.

I used my prized  Bias Tape Maker
for this quilt and really, I can’t say enough about this machine! I love it! It spits out perfect bias tape every time!

I hope this little guy loves it (the quilt, not the machine) as much as I love him!

Oh and YES there will be an organizing post very soon! Starting with Fabric:)

My latest Applique Tools!

On the last episode (The Minutia of Quilting) I spoke of several items that I have been using to better my applique preparations.

The color shapers are invaluable for use with the starch method of preparing applique shapes.  They would also work really well for the glue method.

I have also found that the combination of photo software (paint shop pro, for example) and Cricut and Sure Cuts A Lot software allows me to create unique applique designs and cut them out straight onto freezer paper and voila! Perfectly cut applique templates.

I’m in love.

Scissors and rotary cutters makes this girl happy!

Freezer Paper..

Hey all,

I am working on an episode all about Freezer Paper.  We all use it for some reason or another in our craft and I know I would be lost without it…

I’m hoping that some of my listeners/readers would like to contribute to the podcast by EMAILING (ie not commenting here) me mail@withinaquarterinch.com.  I would love to hear how Freezer Paper has helped you and share with everyone else.  A Freezer Paper Party, if you will.

Thanks in advance!

https://i0.wp.com/www.riodesigns.co.uk/Graphics/FP_all.JPG

Get your ducks in a row for the next project!

Hello!  I have been very busy with the third insallment of the BEEN there DONE that project.

This a going to be a full sized quilt everyone – just warning you.

It is a paper pieced quilt – so I will show you how I do that.

I am also going to be showing you how I ‘quilt as I go’ with I’m sure is way different than most other methods out there and makes it a truly reversible design!

Now – because I basically made it up as I went (and still go) – the quilting – not the pattern, which I’ll get to – I made a few mistakes along the way.

QUESTION for you – should the tutorial INCLUDE the mistakes or not?  I don’t mind sharing my errors and thought process gone awry with you but I also don’t want to confuse anyone… you know what I mean?

So – to get your ducks going –

This is the quilt that started it all and as far as piecing goes – it follows the pattern. (except for the cornerstones!).

It is from the May/June 2009 issue of Love of Quilting from Fons and Porter.

Start cutting my friends – because it requires a lot of it!

If you’d like to get a jump on this project then you will need:

100 2.5″ squares (mine are all different fabrics)

let’s say 90 (because you will want choice) 1.5″ squares (again, I used all different fabrics)

and 1200

yes, I said 1200

1.5″ (the magazine says 1″ but just trust me) strips ranging in size from 3 to 6 inches long.  Yes, I have definitely repeated some fabrics here!!!

By the way – to cut those strips I used the cutter mentioned in this post – it rocks people, get your 40% off Jo-ann’s coupon and get yourself one!

Donna Dewberry Strip Cutter

Shownotes for Episode 41

Well, the big news on this show is my new machine – the cricut!

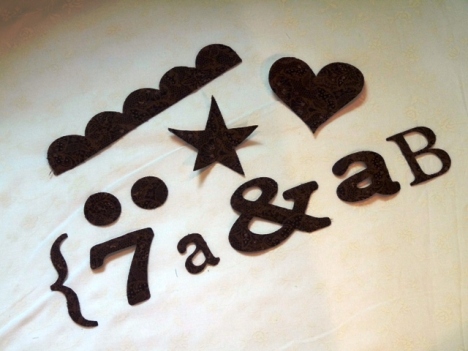
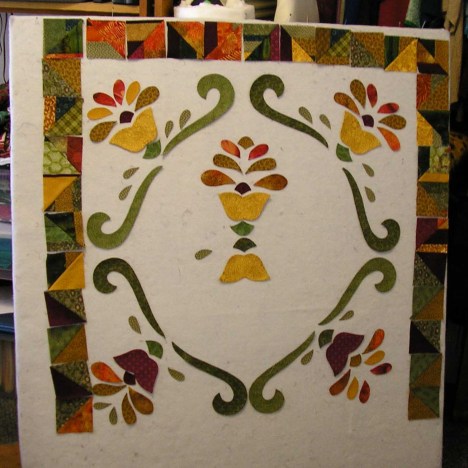
A visual of the shapes I described during the show.

A visual of the shapes I described during the show.

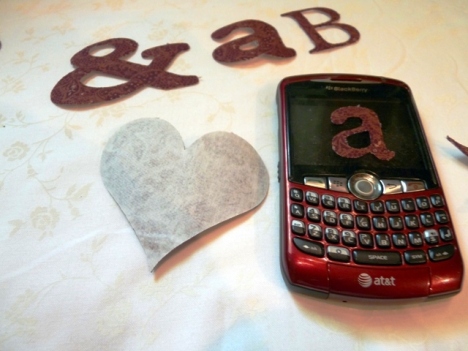
With my cel phone do give you an idea of the size.  And the back of the heart already has fusible on it!

With my cel phone do give you an idea of the size. And the back of the heart already has fusible on it! Oh, and the fabric it is on is the backing fabric I picked up in Pomeroy.

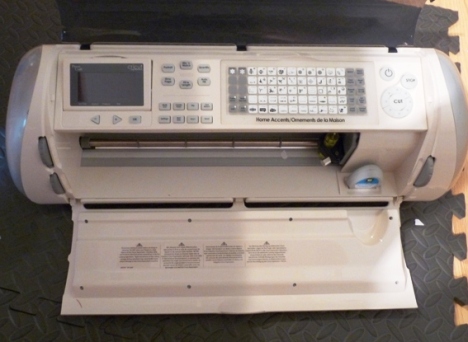
The machine

The machine

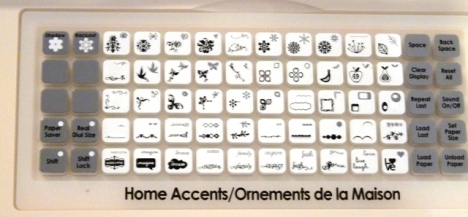
The keyboard for this particular set of shapes - each cartridge comes with it's own removable keyboard - how neat!

The keyboard for this particular set of shapes - each cartridge comes with it's own removable keyboard - how neat!

I still haven't used this newer version of the Guidelines for Quilting Ruler System...

I still haven't used this newer version of the Guidelines for Quilting Ruler System...

I emailed the company looking for more information on this because there website, while fantastic; doesn’t seem to have any info on this one!

And not mentioned in this episode – but yes, another cutting system has entered the Studio of madness – Remember a while back I’d asked if anyone had tried this – well, since noone answered me (ha-rumph!) I figured I should just check it out for myself.  I used my 40% off coupon at Jo-ann’s plus a 10% memorial day discount and made sure it was returnable.  BUT guess what?? It really works! I love it. (darn! – no, really, it’s ok, I need another cutter) The fabric doesn’t slip around and the cuts are clean and sharp.  Uses a regular 45mm blade.

And finally, for today’s post anyway – here is the picture of what Denise in Ca. did with the Fraktur scraps – isn’t it fabulous?!

Denise Fraktur

By the light, of the silvery…

Sewing machine.

I love my machine.  And doesn’t it look so delicious here?

Janome by moonlight

, , , ,

Episode 32 Shownotes! Pictures of the goodies…

A quilty day in Columbus

Shownotes for Episode 15 – NOTIONS!

Here is a photo of majority of the notions I spoke of during the podcast…

please note that the picture above includes the tip off the old podcast – the homemade bias tape wrapped around a tp roll!

Below: The blue ‘scalpel’ like object – yes – awesome! (link is for a metal one, even better!)  The clover glue stick (green cap) – yes – not awesome!  And a photo of the wooden pencil without a led?? Wow, I really need to work on my descriptive abilities! As well as the sandpaper paddle.
The tweezers from EK Success.

NOTE: I HAVE NOT PURCHASED FROM THESE WEBSITES MYSELF – THEREFORE, I CANNOT SAY WHETHER THEY ARE SUPER GOOD OR NOT:)

The chalk mechanical pencil set that I like a lot…  Curious about this though…

BLOG OF THE POD: BLOCK A DAY 
She (Lily Boot) is an extremely talented crafter and also has a wonderful sense of humor!  There is much to ooh and aah over, and enjoy:)

BOOK-E-POD:  Cute Stuff
By Aronzi Aronzo!  Very cute stuff to sew, embroider, create, and applique!

TIP OFF THE OLD PODCAST
: See photo above (the first one) for the TP roll with homemade bias tape wrapped around it!

Oh my, I nearly forgot – here is the link to J. Hittle Sewing – do sign up for the newsletter, the prices are great!

Oh and here is a couple shots of the lecien fabric in all it’s glory!